How to choose the right tiles for your first mosaic art project

Main Highlight: Choosing the right tiles is the foundation of every successful mosaic art project, and starting simple makes the entire process more enjoyable.
Start Simple: Vitreous glass and glazed ceramic tiles are the most beginner-friendly options, offering both easy handling and affordability.
Size Matters: Stick to medium-sized tiles (around 1–2 cm) to avoid frustration and make placement and adjustments much easier.
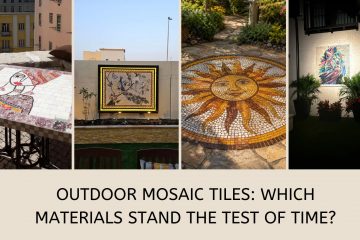
Think Ahead: Always consider where your mosaic artwork will live. Indoor pieces allow more freedom, while outdoor or wet areas require durable, non-porous materials.
Keep it Balanced: A limited color palette (three to four tones) creates a more intentional, cohesive look than an overly busy mix.
Texture Counts: Mixing glossy and matte finishes adds depth, but keeping tile thickness consistent helps avoid uneven surfaces and grouting issues.
Final Takeaway: Mosaic art is flexible and forgiving. Your first piece doesn’t need to be perfect; it just needs to be yours.
(5 minutes) So, you’ve caught the mosaic bug. Maybe you saw a gorgeous backsplash online, or maybe you just have the slightly chaotic urge to break things and turn them into art. Either way, you’re stepping into a craft that’s ancient, calming, and weirdly addictive once you start.

But before you get to the fun part, there’s one thing that trips up almost everyone at the beginning: the tiles themselves. Walk into a shop or scroll online, and it’s basically a color and texture explosion. Beautiful, yes, but also a bit overwhelming if you don’t know what you’re looking for. In this article, we’ll try our best to make things easier for you.

Start with materials that won’t fight you
For your first project, don’t complicate it. You want tiles that are easy to handle and forgiving, and vitreous glass tiles are usually the way to go. They’re affordable, come in loads of colors, and are pretty easy to cut once you get the hang of it. Glazed ceramic tiles are another solid option, a bit thicker, a bit more “solid feeling” in your hand, which beginners often find reassuring.

If you want something with more character, stained glass is beautiful. It catches light in a really soft, almost glowing way, so it looks mesmerizing once installed. Just know it takes a bit more care, so maybe not your first-ever experiment unless you’re feeling particularly bold.

Don’t go too small (seriously)
Many beginners think tiny tiles mean more detail and, thereby, better results. In reality, it usually just means frustration and sore fingers, aaand if you’re anything like yours truly, a volcanic temper tantrum or two… Smh…

Stick with something around 1 to 2 cm. That size is much easier to place, easier to adjust, and honestly, you’ll see progress much faster, which keeps motivation up. Tiny pieces can come later once you’re no longer figuring out your nippers.
Think about its future
This part gets skipped a lot, but it really matters. If you’re making something decorative for indoors, you’ve got freedom. Almost anything works, and you can get playful with a large variety of mixed materials. But if your mosaic is going outside, or in a bathroom, or anywhere with moisture or temperature changes, you need to be more careful. Go for non-porous, durable tiles like glass or porcelain. Otherwise, you might end up with cracking or fading later, which nobody wants after all that effort.

Keep your colors vibrant, but under control
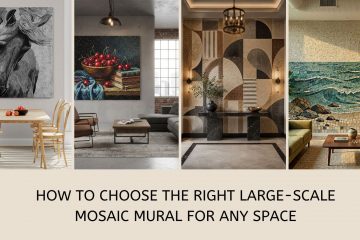
This is where people usually go a bit wild (understandably). It’s tempting to grab every colour that looks nice, but mosaics usually work better when you don’t overdo it. A simple palette, maybe three or four main colours, tends to look more intentional and less messy. If you’re unsure what works together, looking through a mosaic art catalogue can help. Not to copy anything directly, but just to get a feel for how professionals balance colour and texture without making it visually noisy. On that note, feel free to browse through our magnificent catalog and get some ideas.

Texture and thickness matter
Mixing glossy and matte tiles can look amazing, as it adds depth without needing more colours. But there’s one practical thing to watch: thickness. If some tiles are much “higher” than others, your surface starts to feel uneven, and grouting becomes a headache. For your first project, try to keep everything relatively similar in height. It doesn’t have to be perfect, just close enough that the surface behaves nicely.

Final Thoughts
Mosaic art is forgiving in a way that’s kind of rare. If something doesn’t fit, you adjust it. If a colour feels off, you change it. Nothing is really “final” until you decide it is. Keep in mind that your first piece doesn’t need to be perfect. It just needs to exist. Something you built, piece by piece, figuring it out as you go.

Start simple, don’t overthink it, and enjoy the process. Once you begin, it’s very easy to look at empty surfaces and think to yourself, “yeah… I could mosaic that.”


19 Comments
These are great tips. I love how thorough you were in your breakdown of everything.
I know it’s obvious but I didn’t think about the ideal stones to use. It makes total sense that all forms of rock may not apply.
I would definitely start with larger pieces. I mean very large. I’d definitely need to ease into something this intricate.
Such an easy-to-follow guide for starting mosaic art with confidence. Loved the focus on simplicity, balance, and enjoying the creative process.
Thank you for all of the great tips. It is not something that I have tried before but I love art and creating things and creating a mosaic is something that I have been thinking about.
I’d love to start my own little mosaic project. I’ve not done anything like it before, but I think it’s something I could easily fall in love with. I’d naturally go for something small, but reading this that may not be the way to go. Fab inspo!
These are great tips for choosing the right tiles for your first mosaic art project in your home. I didn’t realise there were many steps to consider, from materials to size.
It helps to know how to approach a first mosaic project. I do like the idea of mixing both matte and glossy tiles to add depth. Tile size also makes a big difference so will stick to the 1-2cm as advised.
Thank you so much for your suggestions on how to choose the right tiles for my first mosaic art project. Super helpful.
I am loving this post so much and am pinning it before I leave so that I can come back and check out these tips as I have been so wanting to try making my own mosaic masterpiece! Thank you for the tips and for sharing!
Thank you very much for educating me about how to choose the right tiles for my first mosaic art project. So very helpful.
Love the ‘doesn’t need to be perfect, you just need to start’ ethos. I think this can be translated into many different aspects of life, but great here, because I’d assume creating your mosaic art project could be really overwhelming to start. Definitely something I’d love to try though!!
This blog post is such a helpful resource! We have been considering a mosaic art project so this will come in very useful.
Although I have not taken the jump to getting a mosaic at the moment I do love how versatile mosaics are with the materials used
This is very helpful! I’m quite new to mosaics, so I’m still figuring out how to get started. I’ll definitely keep in mind your tip about working with just 3–4 tones to create a more cohesive look.
I love the look of mosaic tiles. These are great tips, although I don’t know if I’m up for the challenge of doing it myself. I’d probably hire someone or buy it ready-made.
Valuable info on how to choose tiles for your first mosaic art project. Thank you very much for educating me.
I’ve always wanted to try making mosaic art but don’t know where to start so these tips are invaluable.
Fantastic guide! I find it super practical, since I am the one considering location and durability of my first project at the moment!